How to photograph a bicycle,
some do's and don'ts
1. If you have an autofocus camera (whether digital or conventional), find out how to focus it manually. Autofocus cameras tend to focus on whatever is in the middle of the screen, provided that what is in the middle of the screen has a clear contrast line in it. Two situations flummox autofocus systems: either a) what you want in focus is not in the middle, or b) it has no clear contrast line. The first case often occurs when photographing bicycles. What's in the middle of a bicycle is the frame, and what's in the middle of the frame is a gap--so the typical autofocus camera focuses through the frame on whatever is behind: the fence, the back yard, the hedge, wherever it finds a contrast line. So you end up with a sharp photograph of the fence (or whatever) and a blurry bike in the foreground.
|
2. Getting good pictures of bicycles, especially close-up features such as lugwork and components, is vastly easier with the help of a tripod. The results are much improved for both manual- and auto-focus cameras. Having the camera on a stable mount allows you to concentrate on getting just the right bits in focus. It also allows you to cut out unwanted bits of the background (see below) by making small directional adjustments (forward and back, tilting, etc.). If you do not have a good solid tripod already and do not want to spend a lot of money on one, you might consider getting a table-top or backpacker's tripod (see below). This can be perched on the edge of a picnic table, a chair, or even a stack of books, to get it up to bicycle height, and will offer at least some of the benefits of a larger tripod.

Above: the Editor's trusty full-manual analog SLR camera with a backpacker's tripod. Most of the photographs at this web site were taken using the above camera.
One disadvantage of the table-top tripod is that it is difficult to swing it round to the focusing-position and then swing it back round to the picture-taking position, while holding the shutter button half-way down. In this case, enlist the help of an assistant. Set up the bike and the camera (fixed to the table-top tripod) so that the bike (or whatever detail you want) is centered in the camera screen--without regard to focusing. This is what photographers call "composing" the shot (more below). Once you have the shot composed, then pay attention to what the camera is going to try to focus on. If it's the empty space between the frame tubes (e.g., the back fence), then have your assistant dangle a newspaper or some other flat object with a sharp contrast line on it, into the empty space just long enough for the autofocus mechanism to get a fix on it. Depress the shutter button half-way; your assistant then removes the focusing matte, and you take the picture. Hey presto, you got the bike and not the fence in focus!
The swivel-focus-swivel-shoot procedure is easier with a larger tripod which allows you to swivel the camera with one hand while holding down the shutter button half-way with the other; although, here too, an assistant holding a focusing matte in just the right position means you don't have to swivel to focus. Just compose and shoot.

Above: a good tripod allows you to position the camera vertically, and rotate in all three dimensions: roll, pitch, and yaw.
3. Composing the shot. By "composing the shot" we mean getting the right bits in, and cutting distracting bits out. Distracting bits include picnic tables, children's toys, garbage cans, kiosks, beer bottles, drain pipes, bushes, cars, people, your shadow, your feet, "the furniture of the universe" as Bertrand Russell once said. Bicycle enthusiasts want to see the bicycle. Below are several negative examples (all my own); these are some of the blunders to avoid (mouse-over for captions):


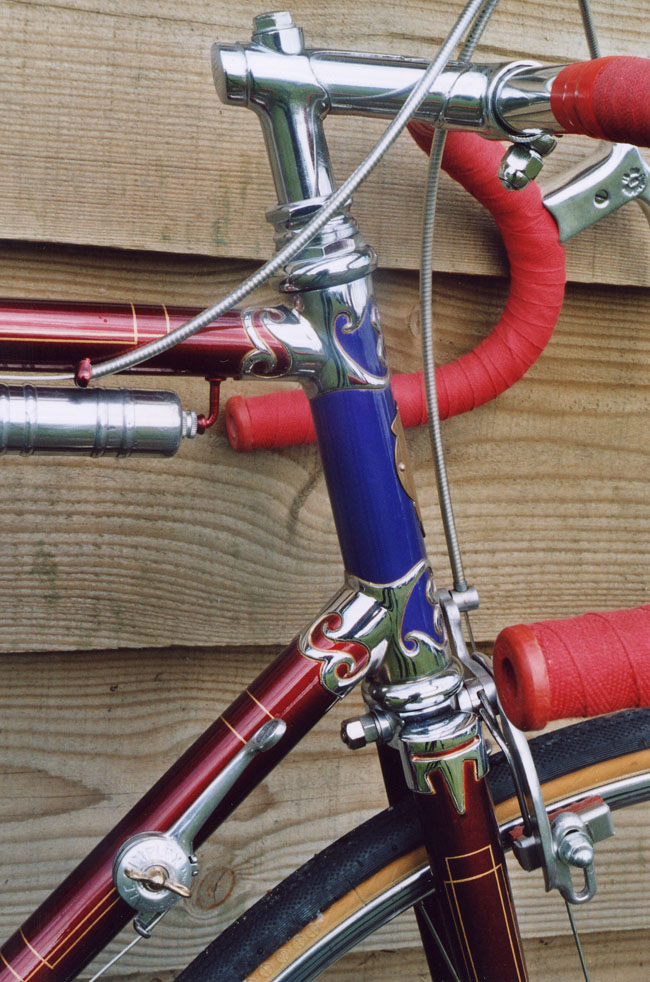
Choose your background so as to be as undistracting as possible. Outdoors: a solid-colored stucco wall is good. A hedge is bad. A stucco wall with a drain pipe running behind the bike is bad. Solid-colored stucco walls are surprisingly rare in some neighborhoods; that, or you can't get far enough away from them to get a whole bike into the picture. Scout around your vicinity: you may find a big enough solid-colored wall at the local supermarket or shopping center. Failing that, two acceptably non-distracting backgrounds are bricks and weathered wooden barns. A pile of newly sawn wood is fine. Again, make sure the background is plenty big so that it completely fills the camera screen and overlaps the bike in all dimensions. Below are three good backgrounds:



Garage doors are dodgey; see why below:
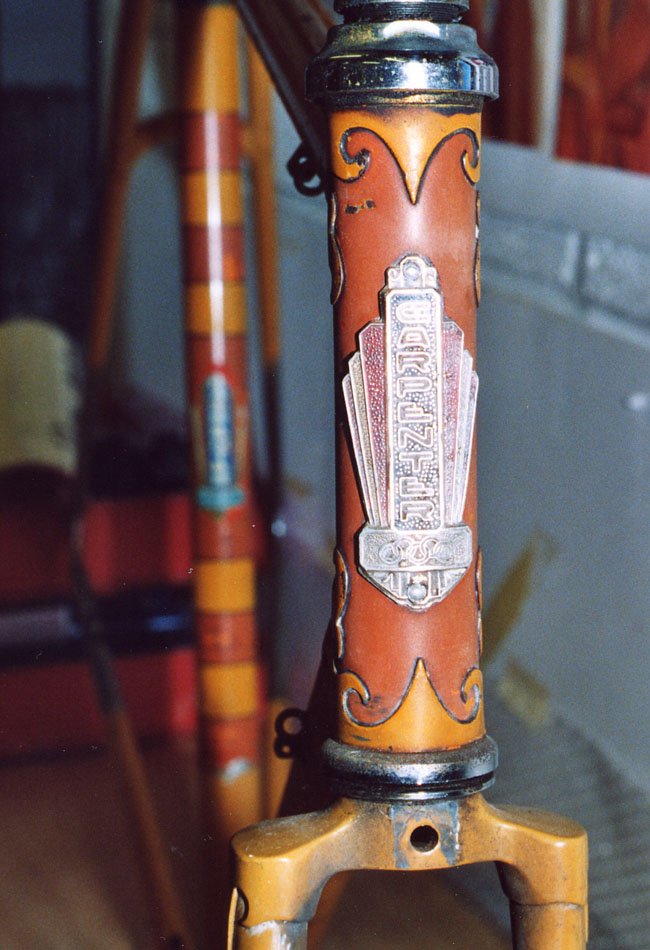
Indoor shots work principally only for details (close-ups of lugwork and components), provided you can get the bike up against a blank wall. For shooting a whole bike indoors, few people have a blank wall which fulfills these three requirements: a) big enough to get a bike next to it without overlapping a sofa or tv or heater or whatever, b) in a room big enough to get the camera far enough away to get the bike all in while excluding the sofa and the tv, and c) well enough lit. Below is a negative example of everything going wrong with an indoor shot: uneven lighting, cluttered background, can't get it all in, can't get it all in focus...
Plan to shoot outdoors.
Assuming you've found a non-distracting bit of background big enough to completely cover the bike--for example, a solid-color stucco wall--, take a look at the ground under the wheels. Gravel, asphalt, or grass is ok, but weeds and rubbish distract. If necessary, prop the bike up on crates or bricks, just to get the wheels up out of the weeds. A grass background works, provided you have enough grass to blot out everything else.


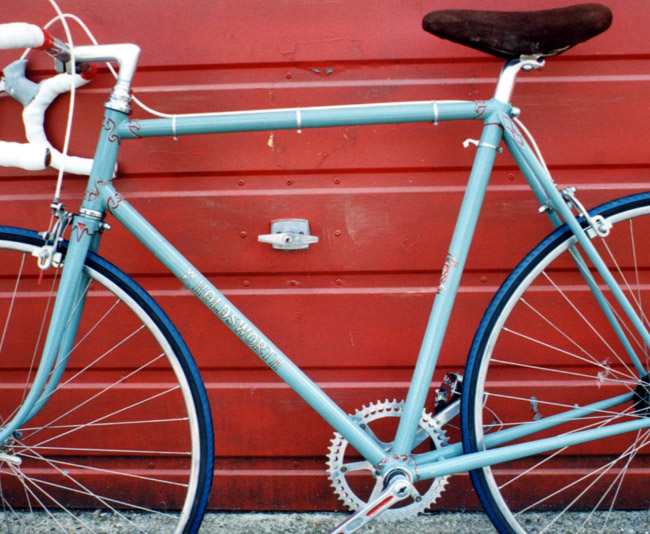
Painted wood sometimes works well; a smear of dirt can sometimes be retouched on the computer later (for example with Adobe Photoshop, as below).
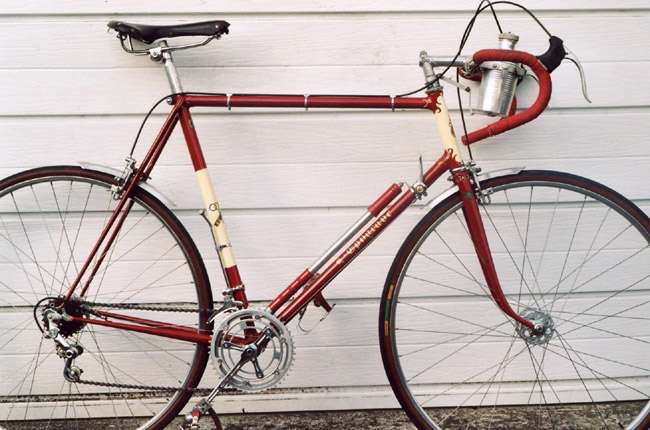
4. Lighting. This is what photography is really about. To get a good picture, you simply must have good light. Good light means strong and even, but not direct. Below is an example of too strong, uneven light--it casts a distracting shadow on the background. Direct light also casts flares on shiny chromed or aluminum parts. (In this case, the gravel background is also distracting; it is busy and makes the eye wander.)
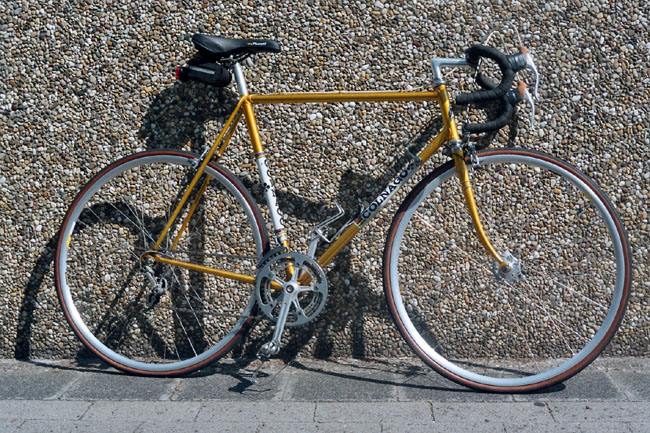
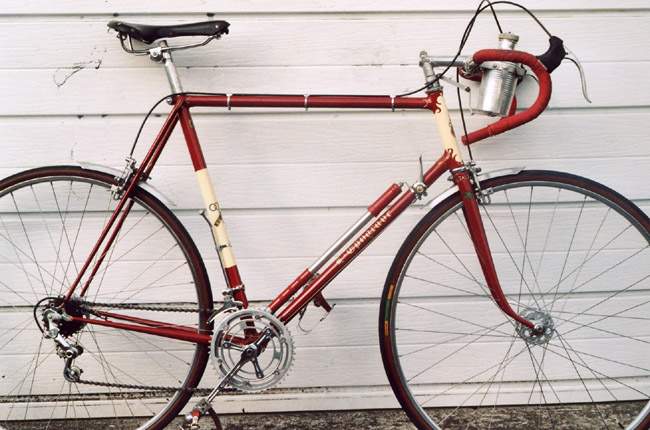
The perfect day is when there is a bright blue sky, so the sky is filled with light from all directions, but the bike itself is not in direct sunlight. In the example below, everything is illuminated evenly with no harsh shadows or flares. If you cannot avoid shadows, remember to keep your own out of the picture.

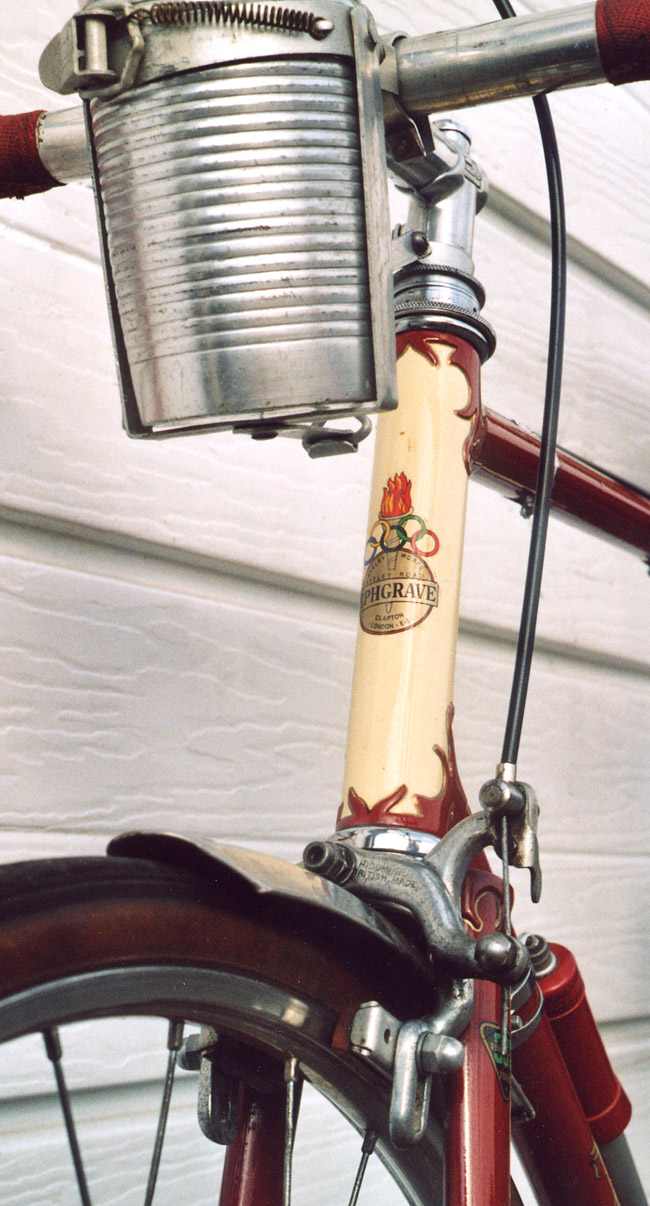
5. Close-ups. There are two golden rules about photographing bicycle details. 1. Get close. Very close. Closer than you thought possible. A tripod is very useful for this. 2. Get down low. Very low. Uncomfortably low. If it doesn't hurt in your knees, you're either a lot younger than I am or not low enough. That little backpacker's tripod is very useful for this. (Alternatively, get the bike up high.)

Those are the basics, whether you are photographing your bicycle for your own pleasure, for insurance documentation, or with intent to submit to a publisher. Personally, I prefer conventional film to digital. I won't swear that I was able to adhere to my own guidelines for all the photos at this web site; sometimes I happened to come across a wonderful bike in a terrible shooting environment, so, rather than let the bike get away undocumented, I made the best of bad job.
Studio shots are best, of course, if you can afford them. Click here to see an example of studio work.
The Editor welcomes submissions to this web site; every Hetchins has a story to tell. Contact
(PS Leave the Photoshop retouching to me.)
3. Composing the shot. By "composing the shot" we mean getting the right bits in, and cutting distracting bits out. Distracting bits include picnic tables, children's toys, garbage cans, kiosks, beer bottles, drain pipes, bushes, cars, people, your shadow, your feet, "the furniture of the universe" as Bertrand Russell once said. Bicycle enthusiasts want to see the bicycle. Below are several negative examples (all my own); these are some of the blunders to avoid (mouse-over for captions):


Choose your background so as to be as undistracting as possible. Outdoors: a solid-colored stucco wall is good. A hedge is bad. A stucco wall with a drain pipe running behind the bike is bad. Solid-colored stucco walls are surprisingly rare in some neighborhoods; that, or you can't get far enough away from them to get a whole bike into the picture. Scout around your vicinity: you may find a big enough solid-colored wall at the local supermarket or shopping center. Failing that, two acceptably non-distracting backgrounds are bricks and weathered wooden barns. A pile of newly sawn wood is fine. Again, make sure the background is plenty big so that it completely fills the camera screen and overlaps the bike in all dimensions. Below are three good backgrounds:


Garage doors are dodgey; see why below:

Indoor shots work principally only for details (close-ups of lugwork and components), provided you can get the bike up against a blank wall. For shooting a whole bike indoors, few people have a blank wall which fulfills these three requirements: a) big enough to get a bike next to it without overlapping a sofa or tv or heater or whatever, b) in a room big enough to get the camera far enough away to get the bike all in while excluding the sofa and the tv, and c) well enough lit. Below is a negative example of everything going wrong with an indoor shot: uneven lighting, cluttered background, can't get it all in, can't get it all in focus...

Plan to shoot outdoors.
Assuming you've found a non-distracting bit of background big enough to completely cover the bike--for example, a solid-color stucco wall--, take a look at the ground under the wheels. Gravel, asphalt, or grass is ok, but weeds and rubbish distract. If necessary, prop the bike up on crates or bricks, just to get the wheels up out of the weeds. A grass background works, provided you have enough grass to blot out everything else.


Painted wood sometimes works well; a smear of dirt can sometimes be retouched on the computer later (for example with Adobe Photoshop, as below).


4. Lighting. This is what photography is really about. To get a good picture, you simply must have good light. Good light means strong and even, but not direct. Below is an example of too strong, uneven light--it casts a distracting shadow on the background. Direct light also casts flares on shiny chromed or aluminum parts. (In this case, the gravel background is also distracting; it is busy and makes the eye wander.)

The perfect day is when there is a bright blue sky, so the sky is filled with light from all directions, but the bike itself is not in direct sunlight. In the example below, everything is illuminated evenly with no harsh shadows or flares. If you cannot avoid shadows, remember to keep your own out of the picture.

5. Close-ups. There are two golden rules about photographing bicycle details. 1. Get close. Very close. Closer than you thought possible. A tripod is very useful for this. 2. Get down low. Very low. Uncomfortably low. If it doesn't hurt in your knees, you're either a lot younger than I am or not low enough. That little backpacker's tripod is very useful for this. (Alternatively, get the bike up high.)


Those are the basics, whether you are photographing your bicycle for your own pleasure, for insurance documentation, or with intent to submit to a publisher. Personally, I prefer conventional film to digital. I won't swear that I was able to adhere to my own guidelines for all the photos at this web site; sometimes I happened to come across a wonderful bike in a terrible shooting environment, so, rather than let the bike get away undocumented, I made the best of bad job.
Studio shots are best, of course, if you can afford them. Click here to see an example of studio work.
The Editor welcomes submissions to this web site; every Hetchins has a story to tell. Contact
(PS Leave the Photoshop retouching to me.)
|
| Restoration | Frame Identification (Serial Numbers) | The Various Models | Rare Models | |
|
| Catalogs | Production History | Racing Heritage | Harry, Jack,& Alf | Special Features | |
|
| Frame Components | Transfers | Lug Designs | Gallery | |
|
| For Sale Used | New Production | Other Marques | Copycats | |
|
| Contacts & Links | What's New | toc | |

